General notes about images:
Make sure the feature image is a 600px x 400px jpeg or png file at a resolution of 72 dpi.
For more information about sizing images, please click here.
General notes about images:
Make sure the feature image is a 600px x 400px jpeg or png file at a resolution of 72 dpi.
For more information about sizing images, please click here.
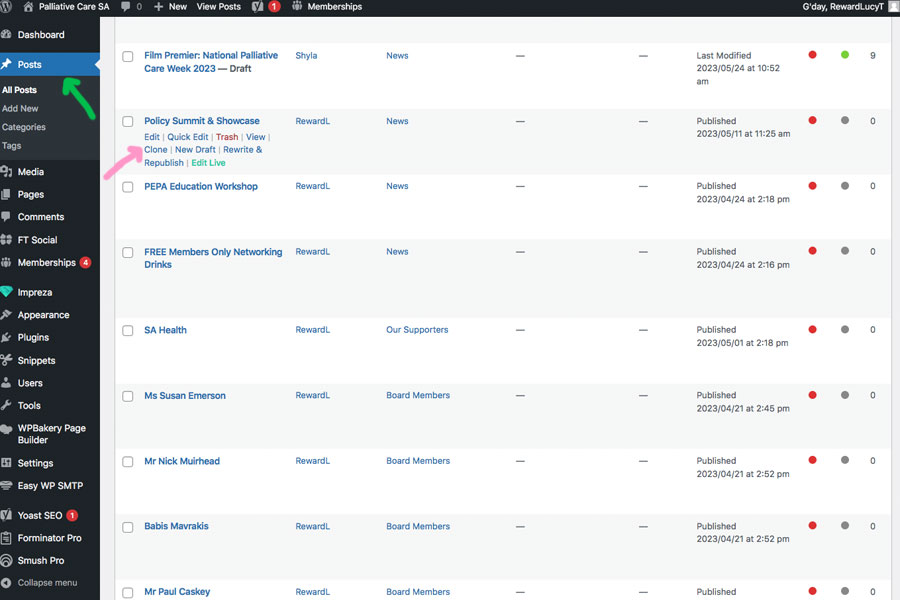
Step 1:
Go to the posts page in the backend of the website (see green arrow).
Find an existing news post and duplicate it by hovering over the name and selecting ‘Clone’ (see pink arrow).
This will create a duplicate of the news post with ‘- Draft’ at the end of the title.
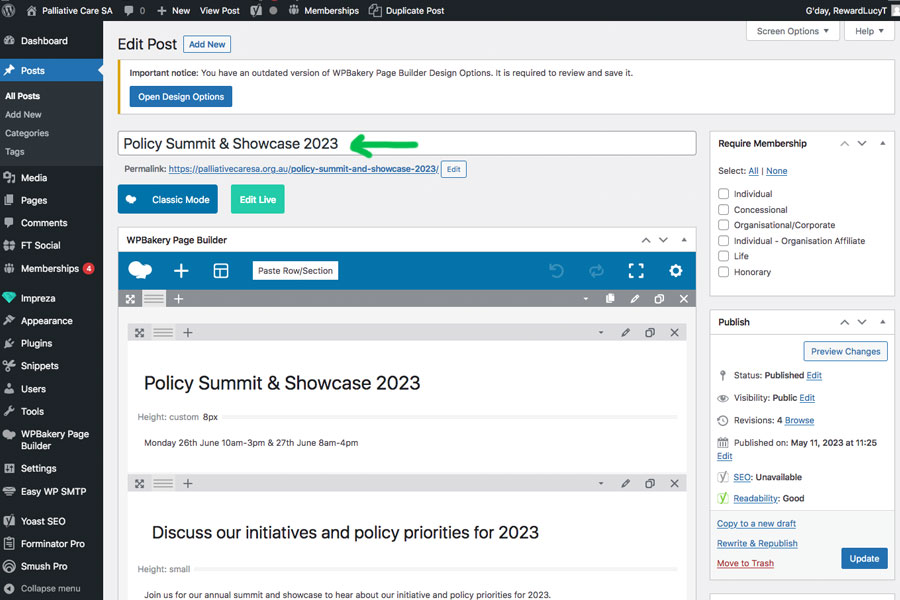
Step 2:
Edit the duplicated post (with ‘-Draft’ at the end of the title) by clicking on the title or by hovering on the title and clicking ‘Edit’.
This will open the page to edit the news post.
Rename the title of the page to explain what the news post is for e.g ‘Name of Event – 2023’ (see green arrow).
This is what will show on the Home and News page, so make it as simple and easy to understand as possible.
If it is an event that will be happening again, e.g ‘Policy Summit & Showcase’ we reccommend adding the current year to the end of the title so it is easy to distinguish between the two.
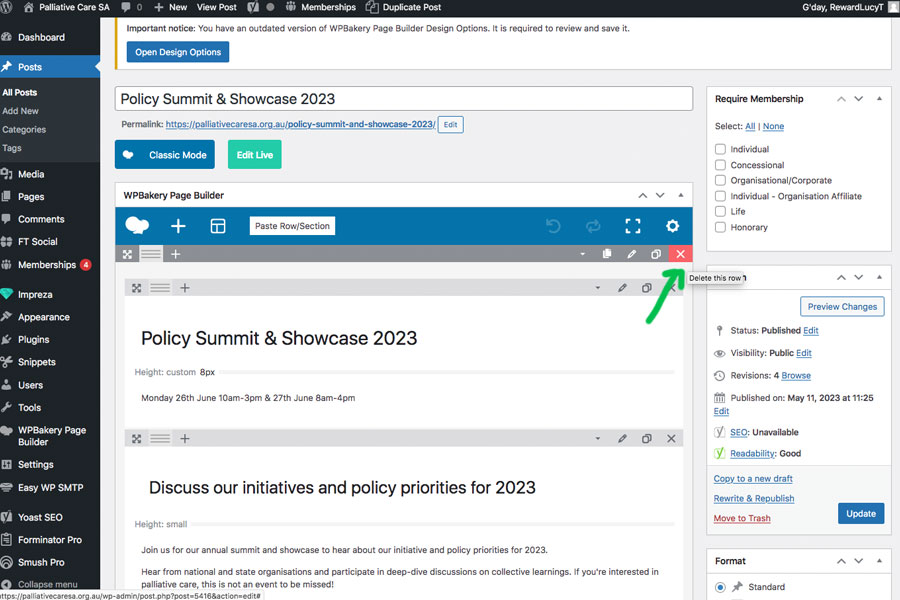
Step 3:
As we have duplicated an existing page, the content will also have been duplicated. Delete this by clicking the ‘X’ in the top right-hand corner (see green arrow).
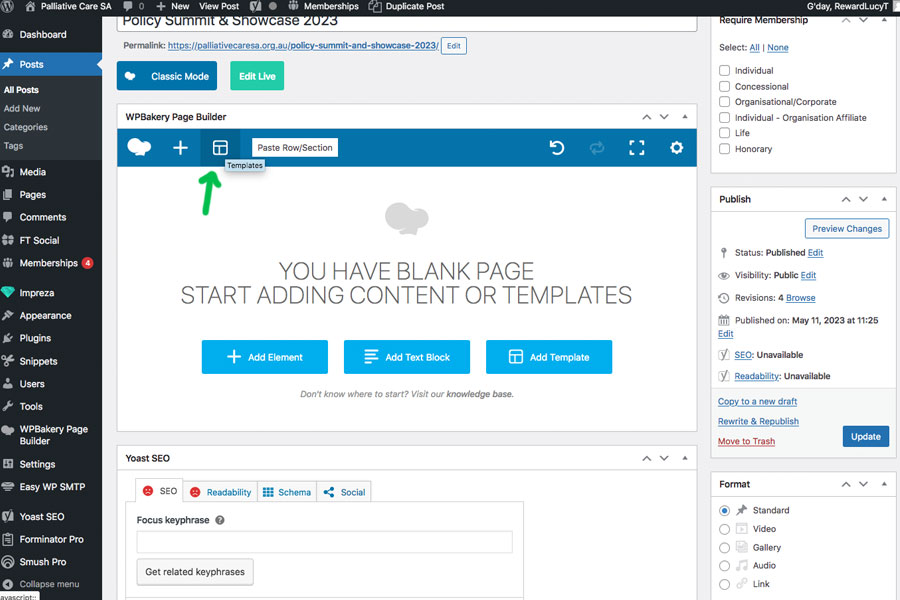
Step 4:
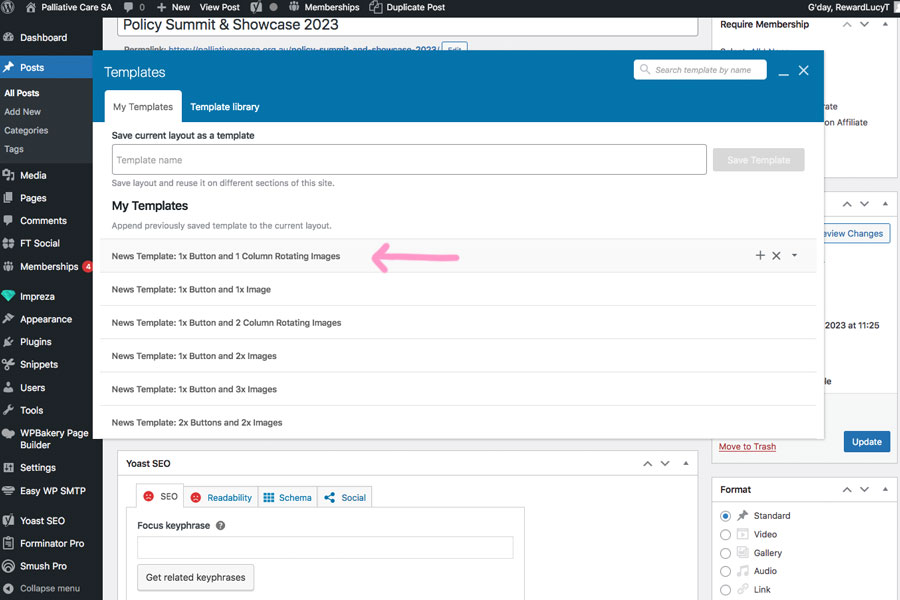
Click on the template button under ‘WPBakery Page Builder’ (see green arrow in the first image).
This will open a window with a list of templates.
You can then select the most relevant template from the list. To add it to the page, click on the name of the template (see pink arrow in the second image)
Step 5:
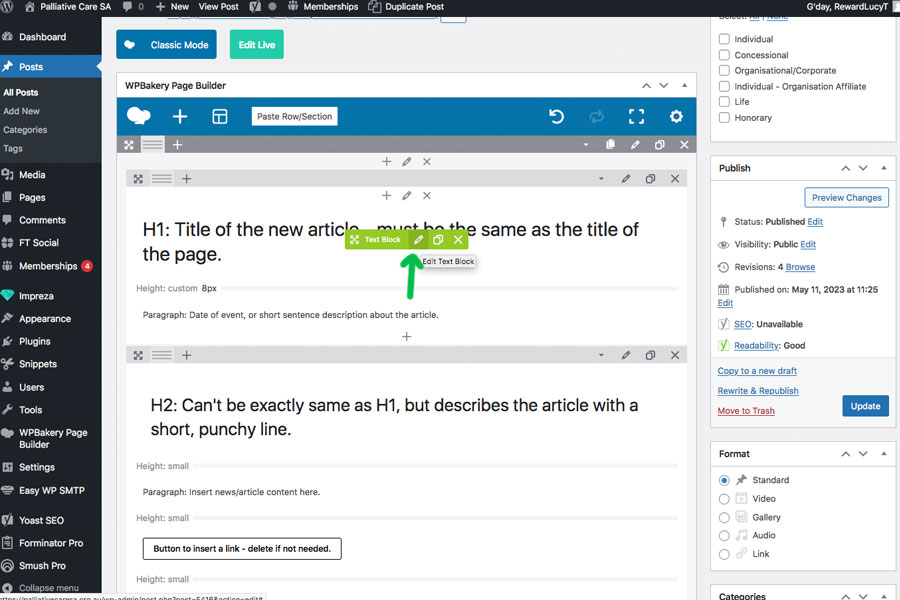
This will open a template with dummy content, that you can edit/copy and paste the correct content into.
There are further instructions in each template about what you will need to do.
To edit an element, hover over it and a green pop-up will show. You can then click the pencil icon to edit it (see green arrow).
For further instructions on uploading images at the correct size for web, please click here.
Step 6:
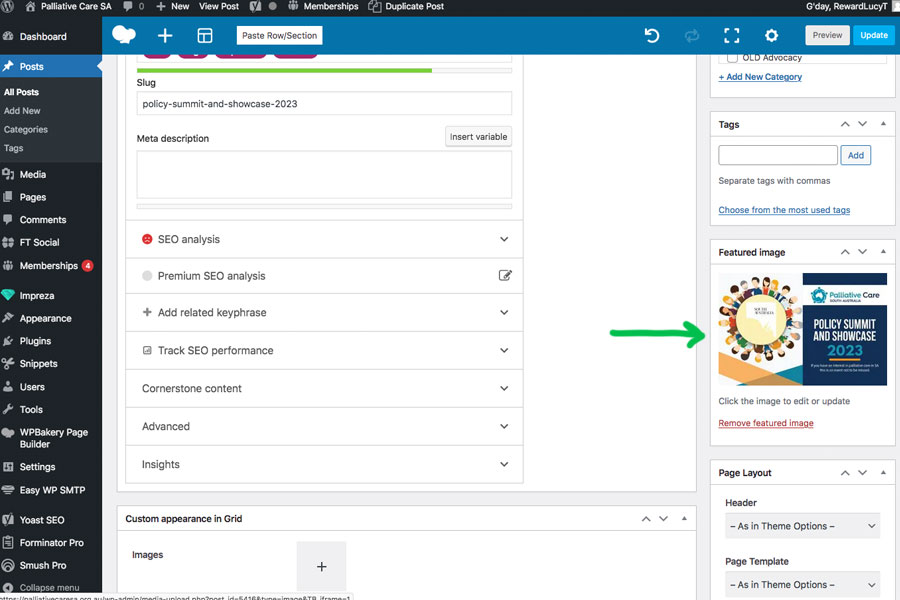
After following the instructions from the template, you will need to change the featured image.
The featured image is the image that will show on the home or news page on the website. You will need to change this to match the new content.
Scroll down to the featured image section on the RH side of the page (see green arrow in the first image)
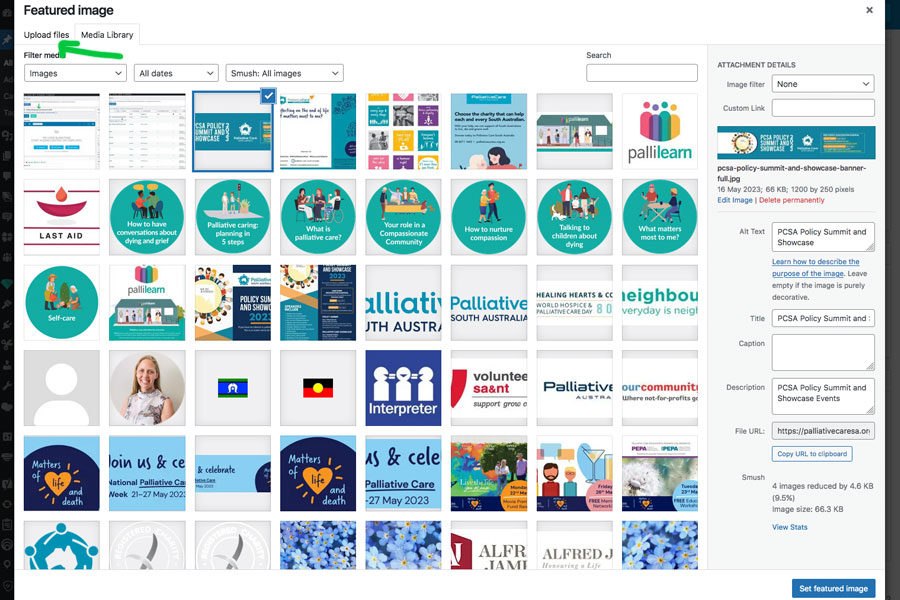
Click on the image to change it. This will open the media library, you can either drag the new image into this pop-up window or you can select the ‘Upload files’ tab in the top LH corner and choose the file from your computer (see green arrow in second image).
Once you have selected the right image, click ‘set feature image’.
Step 7:
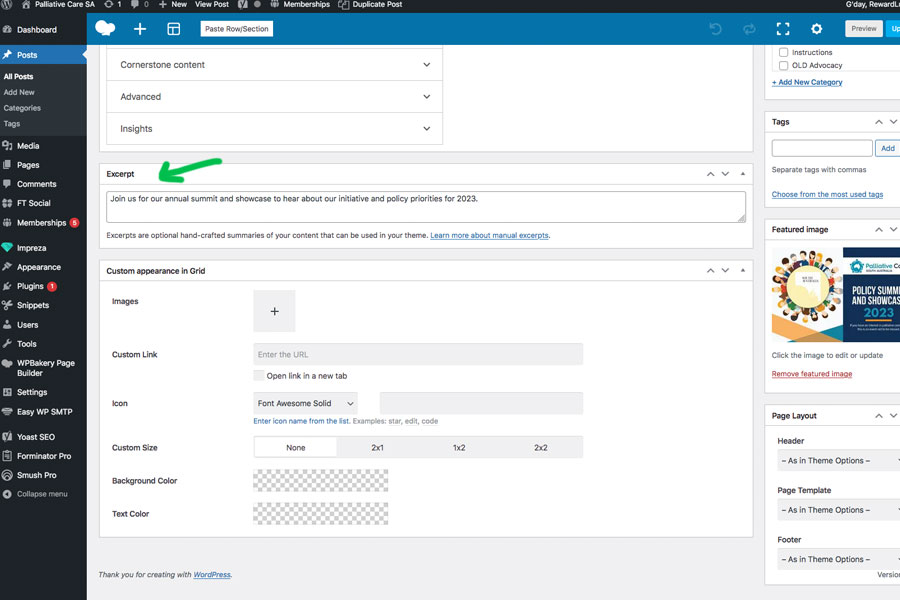
To change the text on the home and news pages, under the featured image – you will need to edit the excerpt text.
If you can’t see this, scroll to the top of the page, and in the RH corner, select the ‘screen options’ dropdown. Then tick the checkbox next to ‘Excerpt’.
Then scroll to the ‘Excerpt’ section towards the bottom of the page (see green arrow).
You can then replace the sentence in this section. We recommend copying the first sentence of the article, or another short sentence that summarises the post.
Step 1:
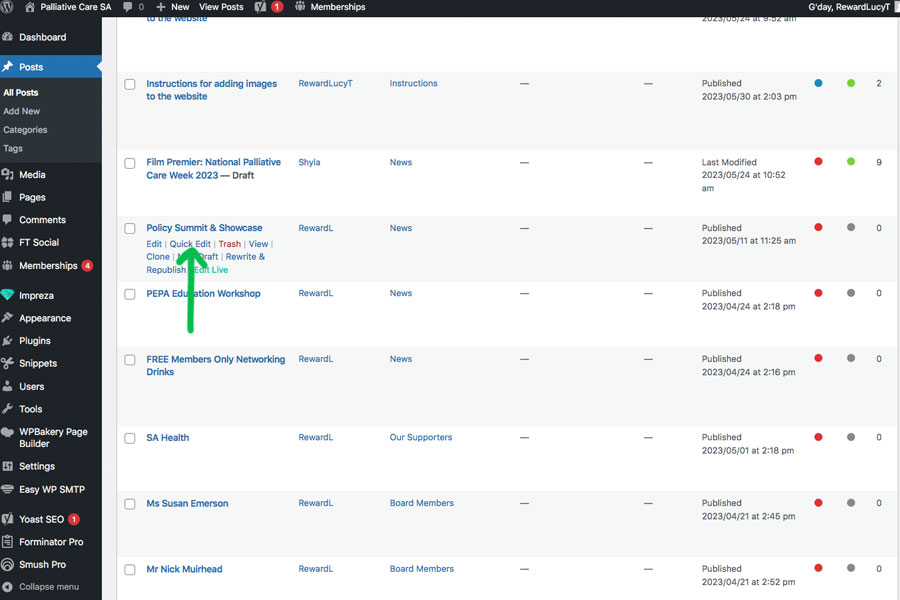
Go to the posts page in the backend of the website and find the existing post you wish to remove from the home and news pages.
Hover over the name of the post and and select ‘Quick Edit’ (see green arrow).
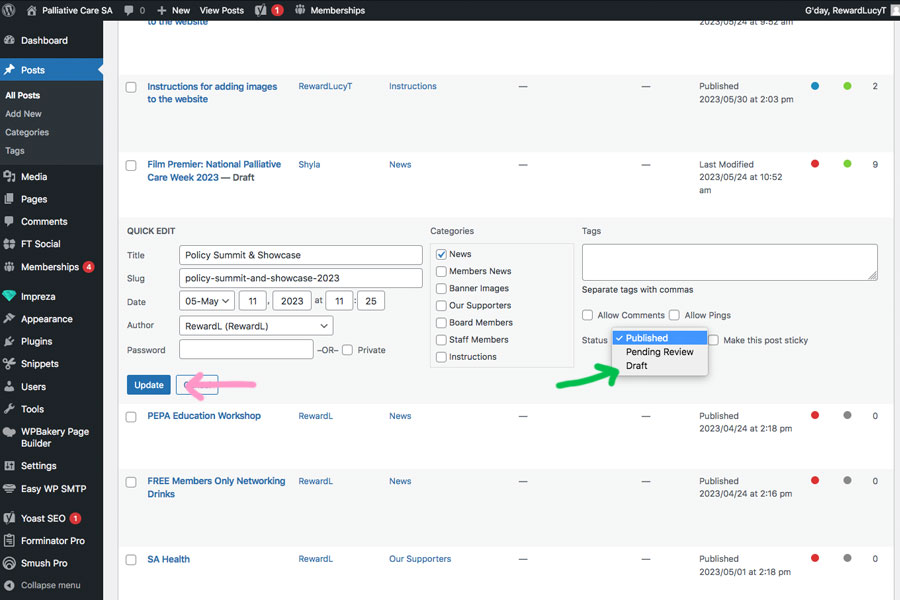
Step 2:
Find the ‘Status’ drop-down and change ‘Published’ to ‘Draft’ (see green arrow).
Then click update (see pink arrow).
This will keep the news post in the backend, but remove it from the home and news pages.