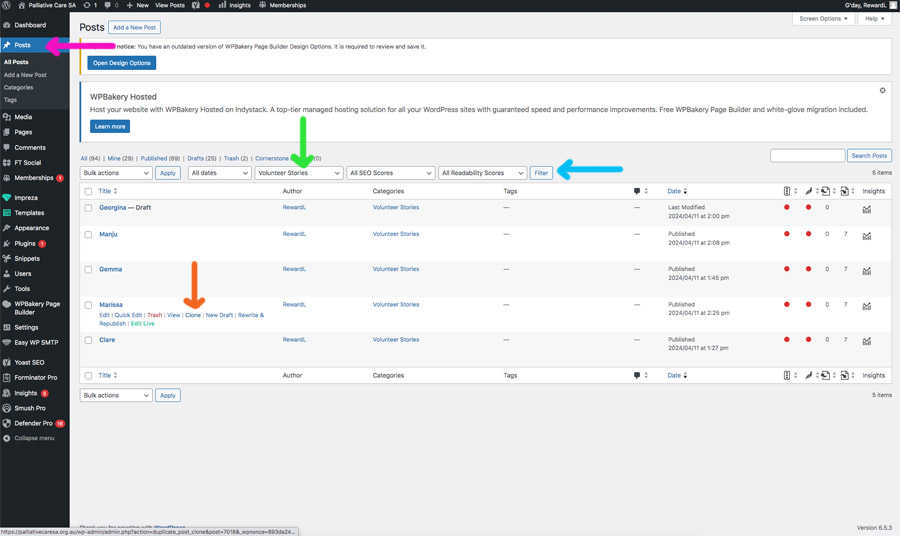
General notes about images:

The circle images shown on these pages will be applied using a template.

Ideally, images used for Volunteers would be 600px x 600px square jpeg or png files at a resolution of 72 dpi.

If the images are squares, you can ensure the crop of the photo includes the full face of the team member.

For more information about sizing images, please click here.

How to add or edit Volunteer Stories

Step 1:

Go to the posts page in the backend of the website (see pink arrow) and find an existing volunteer story by filtering the categories to ‘Volunteer Stories’ (see green arrow) then click ‘filter’ (see blue arrow).

If you want to edit an existing Volunteer Story:
Skip to step 2.

If you want to create a new Volunteer Story:
Find an existing volunteer story with the same set of questions as the new one you wish to add (I believe there were two different Q&A sets). This will make it easier to replace the content in step 3.

Duplicate an existing volunteer by hovering over the name and selecting ‘Clone’ (see orange arrow).

This will create a duplicate of the volunteer with ‘– Draft‘ at the end of the title.

Step 2:

Find the Volunteer you want to edit/replace or edit the new ‘-Draft‘ post by clicking on their name or by hovering on their name and clicking ‘Edit’ (see pink arrow in first image).

This will open the page to edit the Volunteer’s story.

For existing Volunteers:

Go to step 3.

For new Volunteers:

Rename the title of the page to the name of the new Volunteer. e.g ‘Marissa’ (see pink arrow in second image).

This is what will be shown on the Volunteer Stories.

You will also need to edit the URL (permalink) of the post by clicking ‘edit’ (see green arrow in second image). Please copy this: name-volunteer-story into the URL field, just replace ‘name’ with the first name of the volunteer, then click ‘Ok’.

Step 3:

You can now edit or replace the content of the Volunteer Story.

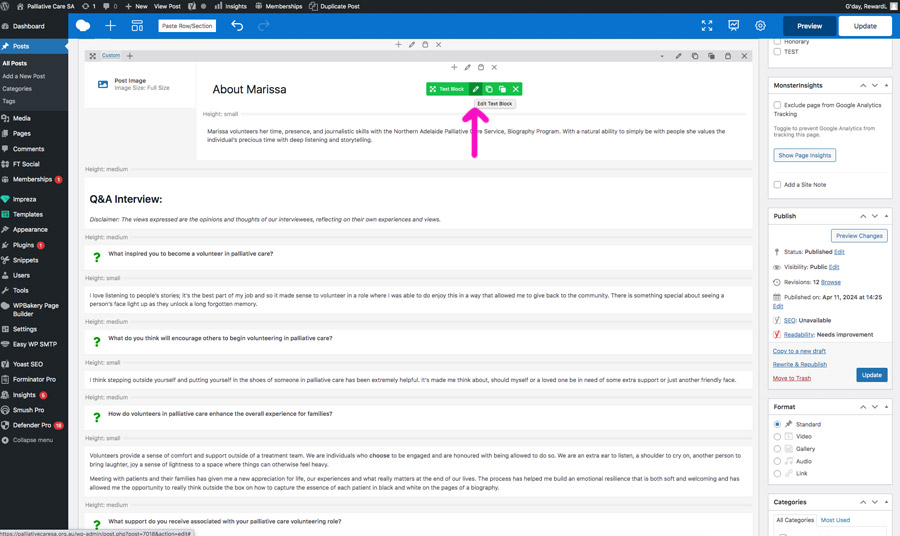
To edit an element (e.g icon box or text block), hover over it and a green pop-up will show. You can then click the pencil icon to edit the content (see pink arrow in first image).

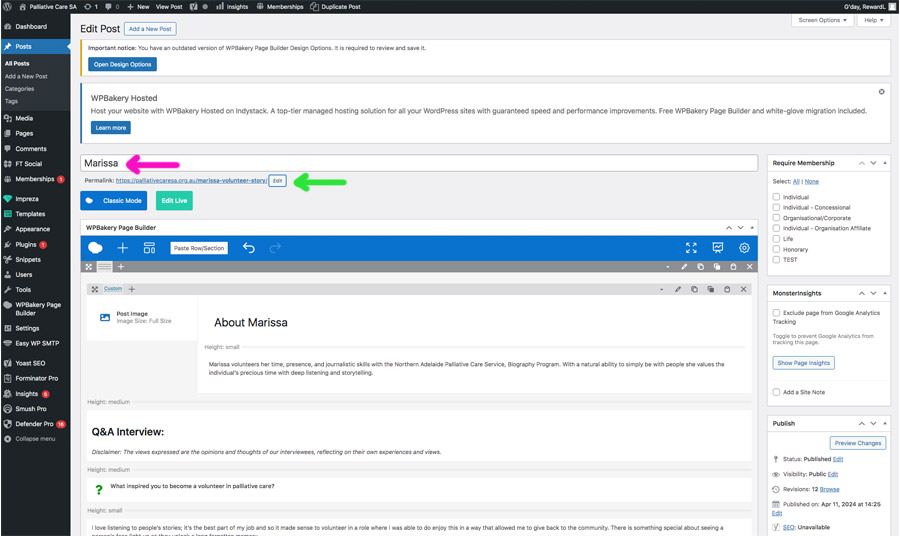
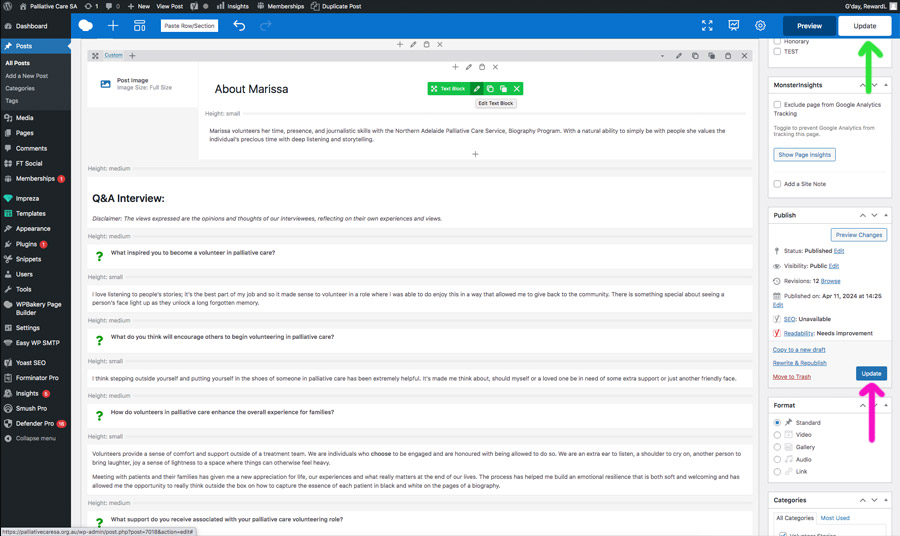
Please note, once you have made the necessary changes to each element, you will need to click the blue ‘Save Changes’ button (see pink arrow in second image).

Please ignore the ‘Post Image’ element. This will bring the picture in automatically.

You can then edit/replace any of the content as needed. Please note:

  • Make sure the volunteer’s name in the ‘About’ section remains as a Heading 2 (see second image).
  • If you duplicated an existing volunteer page with the same set of questions in step 1, you should only need to replace the answers and not the questions as well.

Once you have added/edited the short bio underneath the ‘About’ section, you will need to copy and paste this into the excerpt section so it will show on the ‘Volunteering Hub’ page.

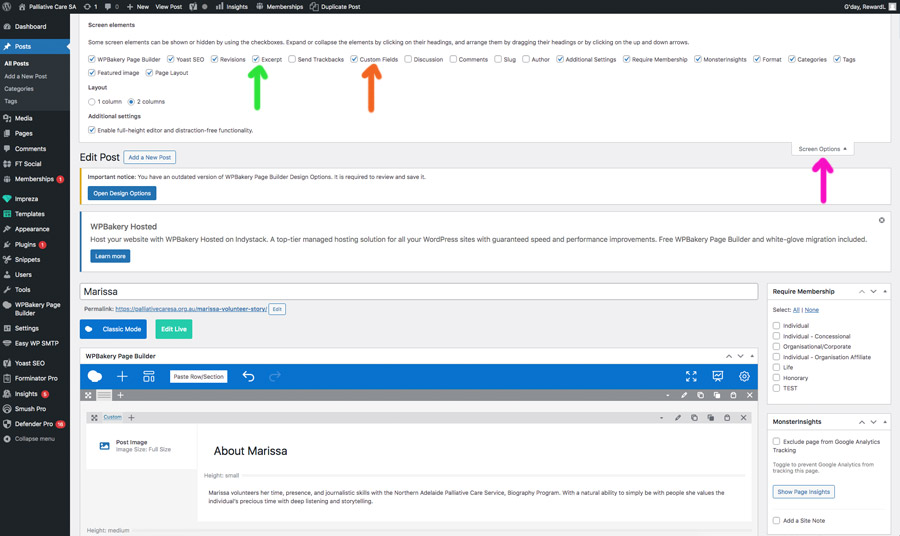
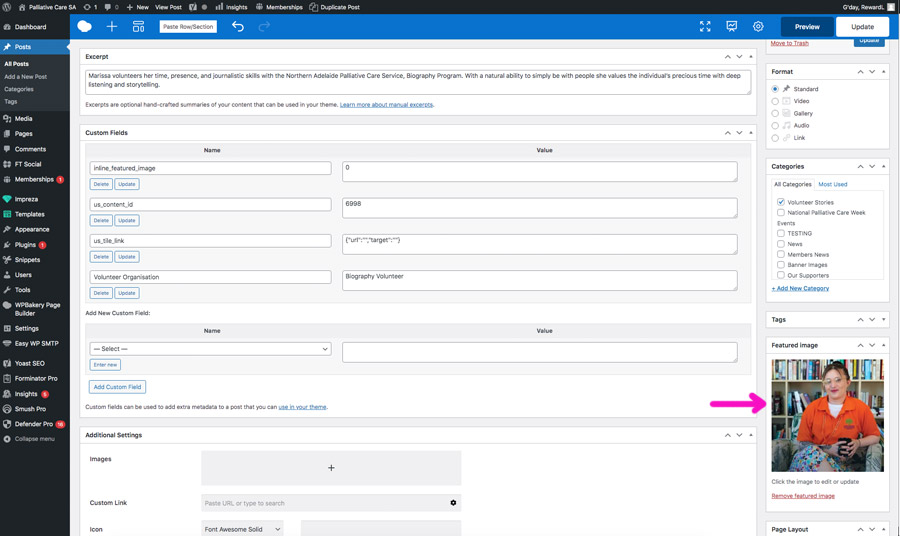
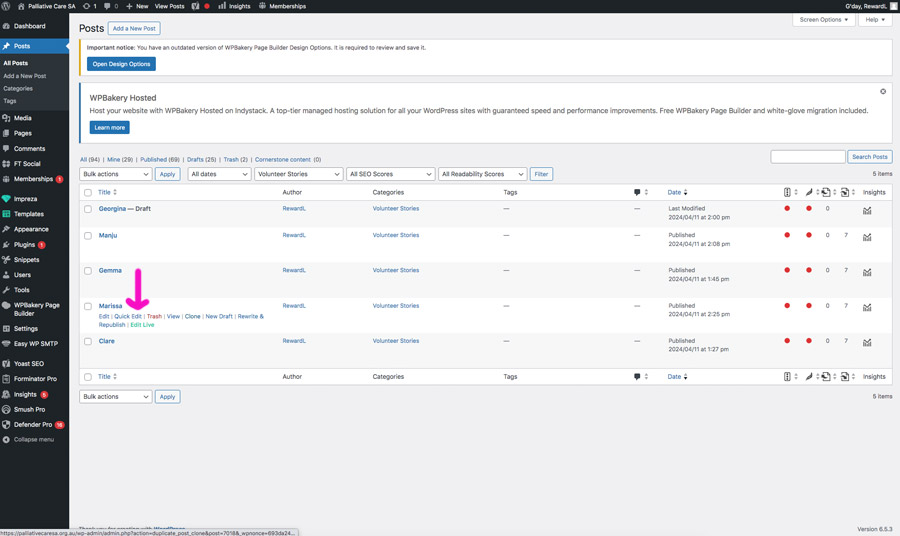
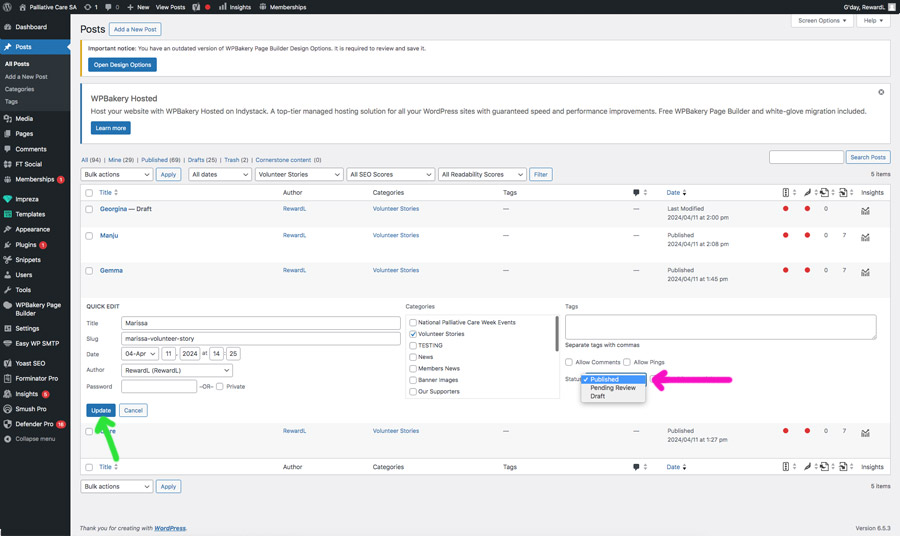
If you can’t see the excerpt section, scroll to the top of the page, and in the RH corner, select the ‘screen options’ dropdown (see pink arrow in third image). Then tick the checkbox next to ‘Excerpt’ (see green arrow in third image) and make sure ‘Custom Fields’ is also selected (see orange arrow in third image).

You can then scroll to the ‘Excerpt’ section towards the bottom of the page (see pink arrow in fourth image). This is where you will paste the bio of the volunteer. Please make sure this is not too long in comparison to the other volunteer stories, and edit it down if necessary.

You will also need to edit the volunteer’s organisation in the ‘Custom Fields’ section (see orange arrow in fourth image).

Step 4:

Please note: you do not need to edit the ‘Post Image’ element next to the volunteer’s ‘About’ section on the page.

To change the volunteer’s image, scroll down to the featured image section on the RH side of the page (see pink arrow in the first image)

Click on the image to change it. This will open the media library, you can either drag the new image into this pop-up window or you can select the ‘Upload files’ tab in the top LH corner and choose the file from your computer (see green arrow in second image).

Once you have selected the right image, click ‘set feature image’ (see pink arrow in second image).

You must then save or publish the post (see pink or green arrows in third image) to save any changes made to the page.

If you are publishing a new Volunteer Story, it will now show in the carousel on the ‘Volunteering Hub’ page.

How to remove old volunteers from the website

Step 1:

Go to the posts page in the backend of the website and find an existing volunteer you wish to remove from website.

Hover over the name of the post and select ‘Quick Edit’ (see pink arrow).

Step 2:

Find the ‘Status’ drop-down and change ‘Published’ to ‘Draft’ (see pink arrow).

Then click update (see green arrow).

This will keep the volunteer in the backend as a draft but will hide it from the live site, and the ‘Volunteering Hub’ page.